Pattern: Demi Octopus
Ravelry link: here
"Hey wait! What's the back story? Where did this craaaaazy thing come from?"
You want back story? I'll give you back story AND a photo tutorial to boot!
Back Story
Necessity breeds Creativity. Plenty leads to Stagnation. That's something I've noticed about myself.
If there's lots of food in the fridge, I'll make a plain stir fry.
If there's tons of yarn in my stash, I'll cast on one of my defaults (socks, aliens, octopi).
If I'm supposed to be doing task A, my brain will skitter around and get OMG distracted by non-existant tasks B, C, and D.
So sometime last week, the planets aligned. I was:
- working on a neverending test knit
- frantically trying to come up with a baby gift
- pondering my yarn allowance
- glaring at my bag of yarn remnants
My eye fell on some pretty, yet disgusting, kinda drooly greeny bluey somewhat reddish DIC Classy that I had (Good Luck Jade). And then this wandering eye of mine spotted a remnant ball of brown Manos Silk Blend (Coffee). And THEN my brain went "Hey! Those two look pretty good together! Kinda poopy, but also very 'modern retro'."
And then "This is not a bad green for an octopus."
Some more thoughts occurred that I don't remember, but I ended up with this:
Project: Octo Cuppa Kobo Cozy


Nitty gritty details on Ravelry here: here

I put that sucker up on Ravelry and, despite its aura of marshy sludginess, it sparked a lot of interest and a lot of requests for a pattern. I'm not putting up a cozy pattern, sorry. It's just a big rectangle held together by two little rectangles (and that only because I ran out of yarn and couldn't knit the big rectangle big enough).
Now what is interesting is the octopus. This would be fun to pattern up, just cause he's pretty easy to make and I like the idea of putting up a complete pattern of an incomplete creature. Ha!
So, yeah, I did that.
And, without further adieu ...
tutorial: demi octopus
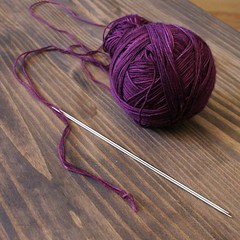
Step 0. In the beginning there was ... yarn.
Held doubled.
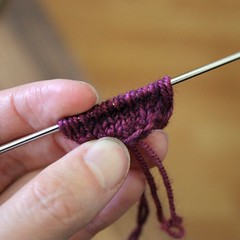
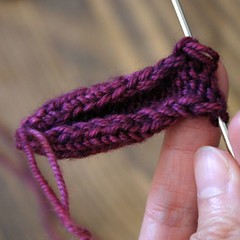
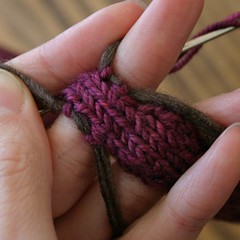
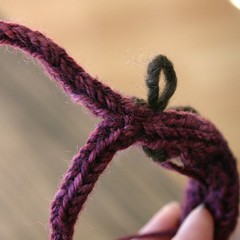
Step 1. mantle increases
Casting On
1. Long tail cast on two stitches
2. Tail is on LEFT side, working yarn on right side.
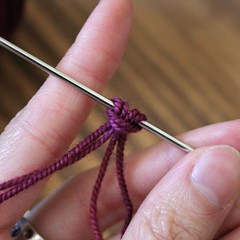

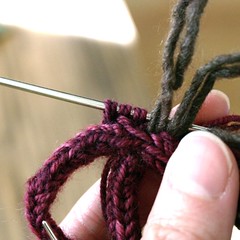
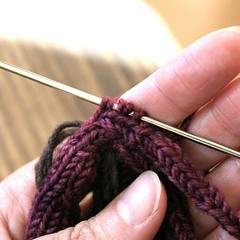
Row 1: m1S, the special increase stitch
1. Knit through a SINGLE yarn in the first stitch (yarn is held doubled)
2. Knit through the other single yarn in the first stitch
3. After repeating m1S on second stitch

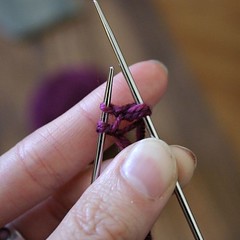
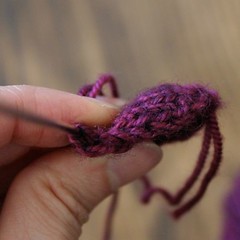
1. Increases all done (after Row 6)
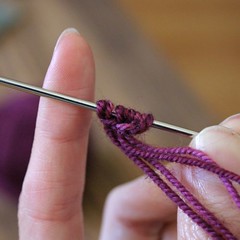
2. After the straightaway (Row 14)
3. Side view - see the bulging?

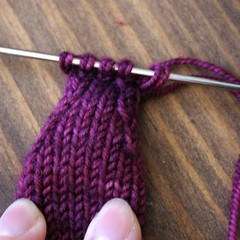
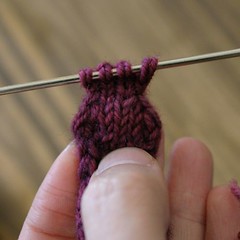
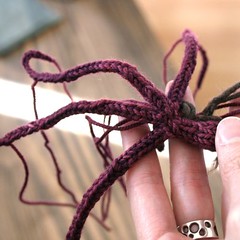
Step 2. mantle decreases
1. After decreasing (Row 24)
2. Relaxed
3. Relaxed, from the WS
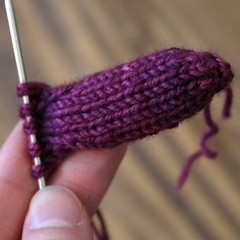
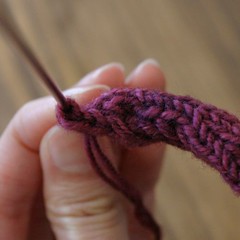
Step 3. eyes
1. After the eyes (Row 30)
2. Side view
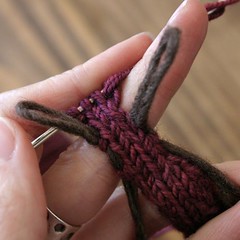
Step 4. body
1. After Row 36 - four stitches on waste yarn
2. Close up!
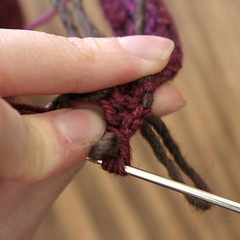
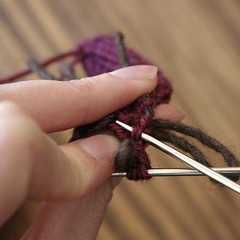
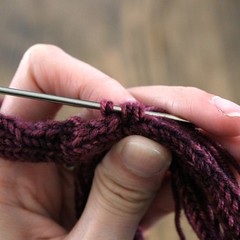
Step 5. tentacles
I apologize for the crap photos - the light changed. :P
1. TR1 - 2 st on needle

1. TR1 - St 3 - view of the back and selvedge
2. TR1 - St 3 - needle inserted
3. TR1 - St 3 - stitch picked up
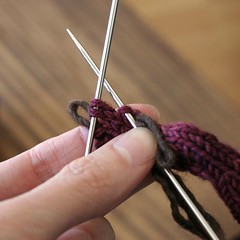
1. TR1 and TL1 complete (I alternated between right and left, but it may be easier to go down one side at a time)
1. TR2 - checking it out
2. TR2 - prepped and ready to start i-cord

1. TL2 - prepped and ready to start i-cord
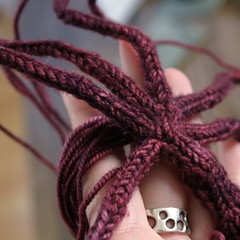
2. Four tentacles done!
3. Five tentacles done!

1. TL3 - prepped and ready to start i-cord
2. Six tentacles done!
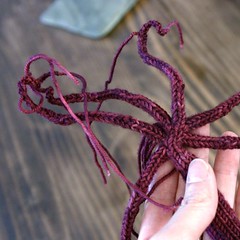 |
| Phew, not bad! |
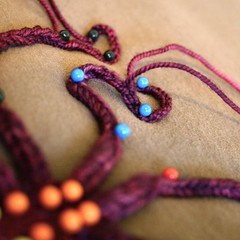
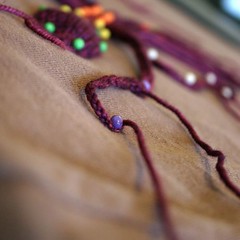
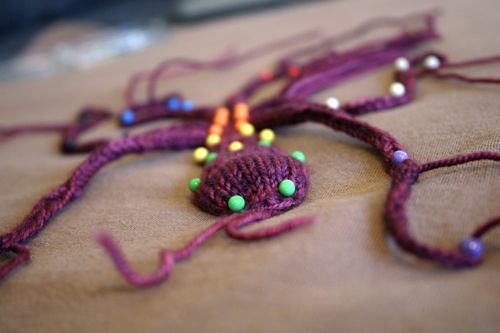
Step 6. Pinning him out
1. Pinned out in style AND colour coded (green=mantle, yellow=eyes, orange=body)
2. Closeup of the non-tentacles
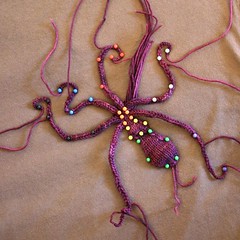
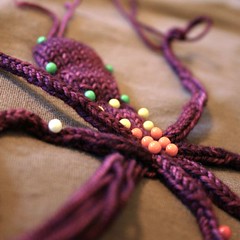
Arms, arms, and more arms. And by "arms" I mean "tentacles". Notice how a few strategically placed pins are all that's needed to hold each arm in its swirly shape.
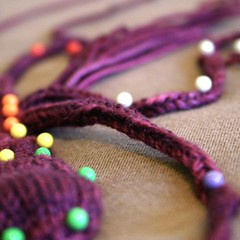
And just cause I like ending with a pretty photo:
This is amazing. I'm just a beginner, and not sure I'm up to this quality yet, but I'm also adventurous enough to give it a try. That's how I learn, anyways - trying to make things I like.
ReplyDeleteI love cephies - hooray! And many, many thanks!
Fantastically fabulous!!
ReplyDeleteThis amazing! Thank you so much for sharing! Can't wait to try it!
ReplyDeleteThank you for this super clear wonderful photo tutorial. Most of us are visual learners, so the exquisitely detailed photos from all angles are SOOOOO appreciated. Love love love this adorable sexty guy :)
ReplyDeleteThis is brilliant, thank you for sharing!
ReplyDeleteThanks everyone! This blog is pretty inactive :P so if you have questions, please ping me on Ravelry! (follow the pattern link at the top of the page) <3
ReplyDeleteA video tutorial would be great!
ReplyDeleteI have never seen anything like this...LOVE IT.!!!
ReplyDeleteMany-many likes..woowww..THANK YOU.!!!
Love&hugs from Flora/Greece.
Please make a video!
ReplyDeleteWhat size knitting needles did you use?
ReplyDeleteHi!
ReplyDeleteLate to the party. I have tried this so many times and the tentacle set up rows are killing me.
Is anyone able to offer some assistance?